Banana Cake w/ Cream Cheese Frosting

Wednesday, March 31, 2010

I hit a wall. I honestly could not decide on what to bake. I had a day full of nothing to do, yet I felt so uninspired. But thanks to an excess of quickly ripening bananas and soon to go bad buttermilk, my choice was made for me.

A cake turned out to be perfect because my mom's birthday is tomorrow. No joke, no "April Fool's", it really is her birthday. I decided to make it in a rectangle instead of my usual layered cake look. I haven't made a one layer cake in a long time so this seemed appropriate. It's a good thing I did this actually, because the cake ended up being so moist, soft, and delicate, that it would never have stood up to being layered and cut into.

I ended up making a few substitutions in this cake. I barely had enough flour, but then I ran out of sugar. Sigh, so I subbed in dark brown sugar but for half the amount I needed. I'm not sure why I thought this was a good idea... I also ran out of vanilla. Well, I thought I did. I then found an unopened bottle later while the cake was cooling. But for a substitute, I used maple syrup. Yeah, I guess i got a little wacky while making this.

Why is there an odd cut out to this cake? Because I was impatient. Because I was hungry. Because it smelled and looked so good. I think you can figure out what happened...

I should make myself a mental post-it note. All things banana baked are best eaten when completely cool or the next day. If I can't remind myself, will you? I devoured a ton of it warm, but really I liked it sooo much better cooled or the next day when the flavor really settled and got gooey.

This cake was really good! I must warn you that it is soooo addicting, though. But I mean there are bananas in it so it has to be good for you, right? I do wish I would have put walnuts in it. However, I knew if I did my dad wouldn't touch it. There's no guaranteeing he'll eat it as is anyway, but this just seemed safer.

Banana Cake w/ Cream Cheese Frosting

from Recipezaar

Ingredients
1 1/2 cups bananas, mashed, ripe (I used 2 1/2 bananas)
2 teaspoons lemon juice
3 cups flour
1 1/2 teaspoons baking soda
1/4 teaspoon salt
3/4 cup butter, softened
2 1/8 cups sugar (I used 1 sugar granulated, 1/2 dark brown. Don't do this haha)
3 large eggs
2 teaspoons vanilla (I used 1/2 teaspoon vanilla, the rest maple syrup)
1 1/2 cups buttermilk

Frosting
1/2 cup butter, softened
1 (8 ounce) package cream cheese, softened
1 teaspoon vanilla
3 1/2 cups icing sugar (I used a whole bag, 4 cups)

Garnish
chopped walnuts (I wish I used them=()

Directions
1. Preheat oven to 275°.
2. Grease and flour a 9 x 13 pan.
3. In a small bowl, mix mashed banana with the lemon juice; set aside.
4. In a medium bowl, mix flour, baking soda and salt; set aside.
5. In a large bowl, cream 3/4 cup butter and 2 1/8 cups sugar until light and fluffy.
6. Beat in eggs, one at a time, then stir in 2 tsp vanilla.
7. Beat in the flour mixture alternately with the buttermilk.
8. Stir in banana mixture.
9. Pour batter into prepared pan and bake in preheated oven for one hour or until toothpick inserted in center comes out clean. (Liesssss! My cake definitely took 1 1/2 hours or more haha)
10. Remove from oven and place directly into the freezer for 45 minutes. This will make the cake very moist. (Huh, I guess I didn't read this part of the recipe because I didn't do this... haha. You'll be fine if you don't.)
11. For the frosting, cream the butter and cream cheese until smooth.
12. Beat in 1 teaspoon vanilla.
13. Add icing sugar and beat on low speed until combined, then on high speed until frosting is smooth.
14. Spread on cooled cake.
15. Sprinkle chopped walnuts over top of the frosting, if desired.
Sugar Cookie Bars

Sunday, March 21, 2010
Okay this is a sad excuse of a post, but it's the only kind of baking I had time for due to my hectic life recently.


This month sucked in terms of baking. I had to skip this month's MSC, which I was mega looking forward to. (Don't worry. I'll be making it as soon as I get the chance!)

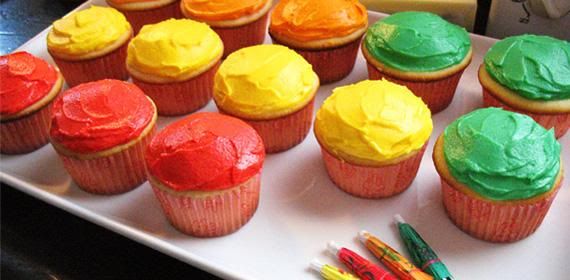
This recipe is nothing I'm too proud of. I just had a major sweet tooth one night and needed a fast fix. I just dumped it in a pan and iced it as I ate it! That explains why the big cookie remained un-iced in the pictures.

I'm not real proud of this post or the pictures or anything, but I feel like I need to show something of what I did with myself in March!

Sugar Cookie Bars
from The Repressed Pastry Chef

1 cup butter; room temp.
2 cups sugar
4 eggs
2 tsp vanilla
5 cups flour
1 tsp salt
1/2 tsp soda

Cream butter and sugar until fluffy. Add eggs, one at a time, mixing after each egg. Add vanilla & mix well. In a separate bowl combine flour, salt & soda & stir with a whisk to combine. Add to wet mixture and mix just until combined. Spread on a greased baking sheet (use a 13 x 18 pan). Bake at 375 degrees for 10-15 min, until light golden brown or until a toothpick comes out clean. Cool completely and frost.

Frosting
1/2 cup butter; room temp
1/2 cup shortening
1 tsp vanilla
pinch of salt
4 cups powdered sugar
5 Tbsp milk
food coloring (if desired)

For frosting combine butter and shortening until smooth and creamy. Add vanilla and salt. Add powdered sugar in 1-2 cup increments until combined, then add milk & mix until smooth and spreading consistency. Spread over cooled cookie, then cut into bars.

Let's Catch Up! & an Oreo Cookie Attempt

Saturday, March 13, 2010
(This is a teaser. You're going to have to read the rest to see the recipe! Hehe)

Okay, let's play a little catch-up here. I've been pretty MIA recently so let me fill you in on a few things:


1. I got my driver's license!


(Legally I must wear glasses when I drive haha)

My BFF showed me the course ahead of time and I practiced it a ton. I have no issue parallel parking outside my house, but when I did it for practice at the test center, I couldn't do it! I honestly spent hours trying to get it perfect, and finally, less than an hour before my test, I figured out what I had been doing wrong! So when it came time for the real test, I did it in one try! In fact, I didn't even pull forward after sliding in=X.


But, I do need to note that my test instructor was extremely intimidating and crazy! At one point he began screaming "Go left! Go left!" when I clearly had my left turn signal on and was turning to the left... He completely freaked me out and I got panicky and began flipping my turn signal back and forth to appease him. Whatever. Then, he had me going 30 mph over a pedestrian crossing and screamed at me for going to slow. Also, he told me I was going to fast on a 40 mph lane when I was going 30 mph.


Oh! And before I did my amazing parallel parking job, he started rambling off instructions and would scream, "Yes or No! Do you understand?" Apparently saying "no" was the wrong answer and he only got angrier. But he passed me. I did a MARVELOUS job, seriously! But he seemed to only pass me begrudgingly. Jerk.


2.
Our school's musical is in full swing and we'll now be having 5 days a week practices. It's really fun so I don't mind it, but it sure is time consuming! Did I ever mention I have the opening solo line? Well I do. And I'm pretty darn good if I may say so;) Oh crap, all my ad sales are due Monday I just remembered... Add that to the "To-Do List".

3. I took the SAT's this Saturday (this morning). I was pretty stressed like the day before trying to cram studying in. I feel pretty good about it but we'll see=/


4. Prom.
I found my perfect dress!

(I can also wear this in the summer thanks to that gorgeous floral print!)

But the designer, Flirt Prom Dresses, can't get it to any of the stores I've called until after my prom=( But I found one place about an hour away that has the only remaining dress and only one and it happens to be my size. I just need to find the time to drive up and get it. It should probably happen soon so if I need to get another dress for whatever reason I'll have time.

Also, these are some of the party buses my friends have been looking into getting. Just take a gander at these beaut's:


WOWOWOWOWOW! My group hasn't decided on what we want yet but it's still so exciting! I'll definitely post a ton of pictures of course;)

5. And finally there's just all my school work to keep up with. In my Adv. Chemistry class we're doing major power point presentations on a company and their product and then the chemistry behind it. I choose spandex and contacted the
ASICS company about it. And they said they could send me a ton of free swag/promotional items! I haven't received them yet though...

My AP English class is kicking in gear with 2 rough drafts for 2 separate papers due this coming week. Can you say fun? It's just rough drafts, though, and thank goodness! Any
Phantom of the Opera fans out there? Well, that's what one of papers is on;)

Okay enough about me. Here's food:


Homemade Oreos
from Smitten Kitchen

Makes 25 to 30 sandwich cookies

For the chocolate wafers:
1 1/4 cups all-purpose flour
1/2 cup unsweetened Dutch process cocoa
1 teaspoon baking soda
1/4 teaspoon baking powder
1/4 teaspoon salt
1 to 1 1/2 cups sugar [see recipe note]
1/2 cup plus 2 tablespoons (1 1/4 sticks) room-temperature, unsalted butter
1 large egg

For the filling:
1/4 cup (1/2 stick) room-temperature, unsalted butter
1/4 cup vegetable shortening
2 cups sifted confectioners’ sugar
2 teaspoons vanilla extract

  1. Set two racks in the middle of the oven. Preheat to 375°F.
  2. In a food processor, or bowl of an electric mixer, thoroughly mix the flour, cocoa, baking soda and powder, salt, and sugar. While pulsing, or on low speed, add the butter, and then the egg. Continue processing or mixing until dough comes together in a mass.
  3. Take rounded teaspoons of batter and place on a parchment paper-lined baking sheet approximately two inches apart. With moistened hands, slightly flatten the dough. Bake for 9 minutes, rotating once for even baking. Set baking sheets on a rack to cool.
  4. To make the cream, place butter and shortening in a mixing bowl, and at low speed, gradually beat in the sugar and vanilla. Turn the mixer on high and beat for 2 to 3 minutes until filling is light and fluffy.
  5. To assemble the cookies, in a pastry bag with a 1/2 inch, round tip, pipe teaspoon-size blobs of cream into the center of one cookie. Place another cookie, equal in size to the first, on top of the cream. Lightly press, to work the filling evenly to the outsides of the cookie. Continue this process until all the cookies have been sandwiched with cream. Dunk generously in a large glass of milk
Take her advice. EAT WITH MILK! I thought it just tasted 10x better that way. It wasn't my fav thing ever=/ Than again, I'm no fan of chocolate or cookies, so I'm biased. The filling was pretty good. Just your reg frosting though. I may have to try it after it's had time to set.


The Moistest Red Velvet Cake

Saturday, March 6, 2010

I have been trying to make this for a while now. It's been about a little over a year since I've last had red velvet cake. That is wayyyy too long!

Moist, moist, moist. That's all I can say. Oh, and DELicIOUS. To quote my sister Amy, "This is the best cake I've ever eaten!" And it truly was. I am in no way a chocolate fan, but I loved the slightly cocoa taste in it.


The intensity of the red was just what I wanted. And with 2 fluid oz, what shouldn't it be?


What I loved about the frosting was how "cream-cheesey" it was. Normally, I love a sugary frosting, but for this I used about half the powdered sugar I normally would. And it was perfect! You could really savor the cream cheese flavor and not be overwhelmed by sugar.


Though I realize there's no cohesiveness to this post, just random blurbs of info, it's due to my lack of time=( So much has been happening these few weeks and it's craycray! I'll try to keep it together here but there's not much of a break for me coming up=/ But enjoy the mediocre pictures!

Oh, and I got this recipe from Pinch My Salt. I LOVE that blog. Fabulous pictures and easy, yet interesting recipes.

Red Velvet Cake

from Pinch My Salt
2 1/2 cups sifted cake flour*
1 teaspoon baking powder

1 teaspoon salt
2 Tablespoons cocoa powder (unsweetened)
2 oz. red food coloring
1/2 cup unsalted butter, at room temperature
1 1/2 cups sugar
2 eggs, at room temperature

1 teaspoon vanilla extract
1 cup buttermilk, at room temperature
1 teaspoon white vinegar
1 teaspoon baking soda


1. Preheat oven to 350 degrees. Butter and flour two 9-inch round ca
ke pans or three 8-inch round cake pans.

2. Sift together the cake flour, baking powder, and salt into a medium bowl; set aside. In a small bowl, mix food coloring and cocoa powder to form a thin paste without lumps; set aside.

3. In a large bowl, using a hand mixer or stand mixer, beat butter and sugar together until light and fluffy, about three minutes. Beat in eggs, one at a time, then beat in vanilla and the red cocoa paste, scraping down the bowl with a spatula as you go. Add one third of the flour mixture to the butter mixture, beat well, then beat in half of the buttermilk. Beat in another third of flour mixture, then second half of buttermilk. End with the last third of the flour mixture, beat until well combined, making sure to scrape down the bowl with a spatula.

4. Make sure you have cake pans buttered, floured, and nearby. In a small bowl, mix vinegar and baking soda. Yes, it will fizz! Add it to the cake batter and stir well to combine. Working quickly, divide batter evenly between the cake pans and place them in a preheated 350 degree oven. Bake for 25-30 minutes. Check early, cake is done when a toothpick inserted in the center comes out clean.


5. Cool the cakes in their pans on a wire rack for 10 minutes. To remove the cakes from the pan, place a wire rack on top of the cake pan and invert, then gently lift the pan. Allow cakes to cool completely before frosting. Frost with buttercream or cream cheese icing (recipe below).

Recipe Notes: *Sift cake flour once before measuring, then sift again with the other dry ingredients per recipe instructions. Wear an apron and be careful with the red food coloring. As you’re mixing the cake batter, use a spatula to scrape down the bowl frequently throughout the entire process.

Cream Cheese Frosting
16 oz. cream cheese (2 packages), softened
1/2 cup unsalted butter (one stick), softened

1 teaspoon vanilla extract

2 1/2 cups powdered sugar, sifted

With an electric mixer, blend together cream cheese and butter until smooth. Turn mixer to low speed and blend in powdered sugar, salt and vanilla extract. Turn mixer on high and beat until light and fluffy. Use immediately or refrigerate, covered, until ready to use. If
refrigerated, the frosting will need to be brought to room temperature before using (after frosting softens up, beat with mixer until smooth).

Recipe Notes: If you prefer a sweeter and/or stiffer frosting, more powdered sugar can be added (up to four cups). But remember, the more sugar you add, the less you’ll be able to taste the tangy cream cheese!


Sorry for having no personality in this post, but it's 12:05 AM and I'm a week late posting about this as it is. I feel bad enough=( But if you take one thing away from this post, remember this: BEST RED VELVET CAKE RECIPE RIGHT HURR!

Homemade Vanilla Ice Cream With My New Ice Cream Maker

Tuesday, March 2, 2010

I got my brand new ice cream maker! I was surprised how fast it was shipped to me, actually. It's just taken me a bit to getting around to using it... I'm a busy girl, ya know? Then there's the whole matter of posting about it. But I got around to it!

I definitely knew I wanted to make a vanilla ice cream because it's simple and the best way to tell if the ice cream maker's legit or not. This one was completely legit
.


The Deni ice cream maker worked wonderfully. I've never used one before, obvi, but this was super easy. It says to let churn for anywhere from 5-30 mins. I think going the full 30 gets you to that ice cream state and not just soupy goodness. 'Cause trust me, even before it's actually ice cream, it tastes HEAVENLY!

I am so thankful to the CSN Stores for giving me this opportunity!
I have always wanted an ice cream maker and everyone in my family is so excited!

We all thought the ice cream was superb! It is so much more cost
effective as well. Not to mention no preservatives or other chemicals. And you can control what you put in it!

The recipe I used was one given in the pamphlet I received with my product. It produced great results. However, I may not return to some of the others because they use a lot of 'light', 'reduced fat', 'skim', or 'egg beater' ingredients. I'm all for the more fat or more natural the better.

I didn't skimp on the vanilla ;)

Nice and thick=)

French Vanilla Ice Cream
Ingredients:
3 eggs
1 cup of sugar

1 1/2 cups milk
2 cups of heavy cream
2 tsp. vanilla

Method:
1. Beat eggs and milk together in a large saucepan.

2. Add sugar and cook over low heat, stirring constantly until thickened (approx. 10 mins).
3. Mixture should coat the spoon.
4. Cool, then add cream and vanilla.
5. Mix well and refrigerate to chill thoroughly.
6. Slowly pour contents into your already spinning ice cream maker.
7. Leave running for about 30 minutes.
8. Allow to freezer in your freezer until desired hardness.

Graham cracker base, homemade vanilla ice cream, chocolate sauce, whipped topping. Missing: Dark chocolate brownie (I didn't get a photo of that one=/)