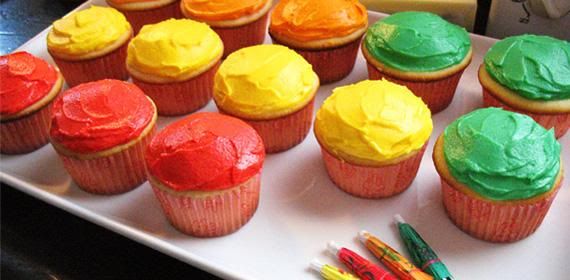
MSC: Applesauce (Pecan) Cupcakes

Monday, November 30, 2009


This months MS Cupcakes Bonus Bake was chosen by none other than... ME! I asked our founder Betty if a recipe had been chosen yet and she said I could pick. After careful consideration I decided the Applesauce Spice cupcakes would be a great pick that kept with the season. As an added plus, I had all the ingredients already in my house. So the very next day I set out to make them!

These came together so incredibly fast. Martha gives you an option of adding chopped pecans, and I would never so no to nuts, so I did. I had plenty left over from our last bake and just needed to toast them a bit.


After the addition of the nuts, I decided the name needed to be changed. I had turned simple applesauce cupcakes into full out pecan cupcakes! Whoops! I probably put wayyy too many in. The applesauce taste was not that present, but that was probably due to the extreme pecan flavor. I also felt these were much more like muffins than cupcakes. They were crumbly and a tad dry, which brings me to the next bit of news...


I kinda burnt them... Which has NEVER happened to me!!! But there's a first time for everything. With my oven I always take Martha's cooking times with a grain of salt. In the past I've had to cook them for up to 10 minutes over the suggested baking time. This time, at exactly the recommended time, they were done. However, I was skeptical and put them in for 2 minutes longer and it was two minutes too much. So they came out a bit dryer than I'd like and the wrappers needed some effort to pull off but they were definitely still edible.


I had wished to share these with some people at school but I didn't want to give something that wasn't my best effort=/ I did give a few to the bake sale for the Turkey Bingo I mentioned earlier.

For these cupcakes I made the browned butter cream cheese frosting like suggested. It paired very nicely and went well with the overload of pecans.

Out of the 18 serving size Martha said you'd get, I got 24. Figures.

Overall, they definitely weren't my favorite cupcake, but that's probably all my fault anyway. Would I make them again? Ehh, probably not=/.

Also, just so you know, I wrote this whole post with one hand because my cat was sleeping on the other=) (using shift was a nightmare!)

Browned Butter Pecan Pie

Sunday, November 29, 2009


With all the left over goodies in my house during the holidays, it just didn't feel right to not give this pie some special attention. So I waited a few days to make it so all the others could clear out.


I haven't made a pecan pie ever in my life. And besides having a small sample of it at a Williams Sonoma store, I've never even tasted it before. In fact, I've never really made a pie before come to think of it. I did make a lemon cream pie, but with a store bought graham cracker crust, so it doesn't count.


I initially was looking at a recipe on and msn cooking page, but my mind was made up when I saw this browned butter pecan pie on Cookie Madness's blog. Also, I took a million pictures of this thing because I was sooo proud of it! I haven't tried it yet because it needs to cool and I'm off to work, but as soon as I try it I'll let you know!

Old Favorite Browned Butter Pecan Pie

1 ½ cups pecan halves
1 (4 oz) stick butter (regular or unsalted)
3 large eggs
1 cup sugar
1 cup dark corn syrup (or use ½ dark plus ½ light)
1 teaspoon vanilla extract
1/4 teaspoon salt
1 unbaked pie shell – use homemade or refrigerated

Lay 1 cup of the pecan halves on a cookie sheet and bake at 400 for about 6-8 minutes or until toasted. Let cool, then chop so that you have 1 cup chopped toasted pecans and about a half cup of pecan halves (these will be the border).

Melt the butter in saucepan set over medium heat and cook it just until it starts to brown. Remove from heat and let it cool for about 10 minutes.

Whisk the eggs lightly in a large mixing bowl. Whisk in the sugar, corn syrup, vanilla and salt. Pour in the semi-cooled browned butter.

Put the chopped pecans in the unbaked pie shell and pour the filling over the top. Use the remaining 1/2 cup pecan halves to make a border. Bake at 400 for 10 minutes, then reduce heat to 325 degrees F. and bake for another 35-45 minutes** or until the sides are set but the center (about a 3 inch circle in the middle) is still jiggly. Remove from oven. Pie will set as it cools. Let it cool at room temperature for a few hours. Store in refrigerator until ready to serve. You can keep it at room temperature, but it won’t be as stiff.

Note: Deep dish pies usually bake 400 for 10 minutes and 325 for 45 minutes while smaller pie tins usually take the original amount of 400 for 10 minutes and 325 for 35 minutes.

Added later that same day: There are no words to describe the wonderfulness of this pie! Although I have nothing to compare this to, I know I never want to try any other pecan pie in my life!!! The sweetness of it is definitely there, and I love it for that! Ahh... the gooeyness is incredible! I also think the crust from Joy the Baker that I used was a perfect choice. Make this gloriousness this holiday season!!

Market District Cooking Class

Saturday, November 28, 2009
I had my first Giant Eagle Market District Cooking Class today. It was fabulous! It was Mastering the Art of French Cooking based off of Julia Child's cookbook. All classes were free for the month of November, and although we had been hoping for other classes, this was the only one left with any available room. But, who could complain about learning to cook like Julia Child?! (No, I have seen Julie & Julia yet, but I want really want to!)

I went with my mom, of course, and altogether there were twelve in the class. We split into groups of four and we were paired with two sisters. It was a great group. We laughed, made mistakes, questioned and learned. Each group was assigned a Market District chef, and we were lucky enough to get the coordinator of the class. They also gave cute little binders for us to put the recipes we learned into it. And, for when we come back, we can add others to it.

On the menu was a gratin dauphinois (cheesey potatoes), coq au vin (chicken in red wine with onions, mushrooms, and bacon), and le tarte demoiselles tatin (upside-down apple tart) with creme anglaise.

We began with a demonstration on how to make creme anglaise. Then, we started with the apple tart so it could have time to bake. My mom and I went to making the crust while Julie and Lisa (the sisters), worked on peeling and slicing the apples. Well, my mom and I screwed up the crust (we all knew it was coming, right?) and so it had to be thrown out. Trust me, we were laughing about it=). So then we traded jobs and they got to make the crust, this time with the correct amount of sugar...

After they assembly of the tart, they were placed in the oven and we could begin working on the chicken. Chef David, our instructor, gave such great tips and tricks and really made us feel relaxed. We were able to have a lot of fun.

Mid way through the chicken we worked on the potatoes. It was just layered potatoes in a pie shell with cheese. Classic yet delicious.

The chicken was cooked in three cups of red wine and came out fabulously.I have now decided that that is my favorite way to eat chicken! The gratin was good, however, not great. But the apple tart with creme anglaise, incredible!!!

It was such a good time and the food was fabulous. At the end, we got the catalog for the classes in the coming months. These ones coming up will no longer be free, but I think it is well worth it.

Unfortunately I did not take any pictures, although it was visually adorable food. But I am including the awesome recipes!

Gratin Dauphinois

Ingredients
2 lbs. potatoes (6 to 7 cups when sliced)
1/2 clove unpeeled garlic
4 tbsp. butter
1 tsp. salt
1/8 tsp. pepper
1 cup (4 oz.) grated Swiss cheese
1 cup boiling milk

Directions:
Preheat oven to 425 degrees. Peel the potatoes and slice them 1/8" thick. Place in a basin of cold water. Drain when ready to use. Select a round metal (fire-proof) dish 10" in diameter and 2" deep and rub with cut garlic. Smear the inside of the dish with 1 tbsp. butter. Drain the potatoes and dry them in a towel. Spread half of them in the bottom of the dish. Divide over them half of the salt, pepper, cheese, and butter. Arrange remiaing potatoes over the first layer, and season them. Spread on the rest of the cheese and ivide the butter over it. Pour on the boiling milk, Set baking dish over heated stove and when simmering, set in upper third of preheated oven. Bake for 20 to 30 minutes or until potatoes are tender, milk has been absorbed, and the top is nicely browned.

**I would add a lot more salt and pepper and definitely more cheese. Possibly a different cheese as well.

Coq Au Vin (chicken in red wine with onions, mushrooms, and bacon)

Ingredients
3 (4 oz.) chunk of lean bacon
2 tbsp. butter
2 1/2 to 3 lbs. cut-up frying chicken
1/2 tsp. salt
1/8 tsp. pepper
1/4 cup cognac
3 cups young, full bodied red wine (Burgungy, Beaujolais, Cotes du Rhone, Chianti, Cabernet)
1 to 2 cups chicken stock
1/2 tbsp. tomato paste
2 cloves garlic
4 sprigs thyme
3 bay leaf

Directions:
Remove the rind of bacon and cut into lardons (rectangles 1/4 inch across and 1 inch long). Simmer for 10 minutes in 2 quarts of water. Rinse in cold water. Dry.

In a heavy 10" casserole, add butter. Sauté the bacon slowly in hot butter until it is very lightly browned. Remove from pan.

Dry the chicken thoroughly. Brown it in the hot fat in the casserole.

Season the chicken. Return the bacon to the casserole with the chicken. Cover and cook slowly for 10 minutes, turning the chicken once.

Uncover and pour in the cognac. Averting your face, ignite the cognac with a lighted match. Shake the casserole back and forth for several seconds until the flames subside. *we didn't do this.

Pour the wine into the casserole. Add just enough stock to cover the chicken. Stir in the tomato paste, garlic and herbs. Bring to the simmer. Cover and simmer slowly for 25 to 30 minutes or until the chicken is tender and its juices run a clear yellow when the meat is
pricked with a fork. Remove the chicken to a side dish.

While the chicken is cooking, prepare the onions and mushrooms.

Simmer the chicken cooking liquid in the casserole for a minute or two, skimming off the fat. Then raise the heat and boil rapidly, reducing the liquid to about 2 1/4 cups. Correct seasoning. Remove from heat, discard bay leaf.

Blend the butter and flour together into a smooth paste. Beat the paste into the hot liquid with a wire whip. Bring to the simmer, stirring, and simmer for a minute or two. The sauce should be thick enough to coat a spoon lightly.

Arrange the chicken in the casserole, place the mushrooms and onions around it and baste with the sauce. Serve from the casserole, or arrange on a hot platter. Decorate with sprigs of parsley.


Brown-Braised Onions:
12 to 24 small white onions, peeled 1" in diameter
1 1/2 tbsp. butter
1 1/2 tbsp. oil
1/2 cup beef stock or red wine
4 parsley sprigs
2 bay leaves
3 sprigs thyme
salt and pepper to taste
3 tbsp. flour
2 tbsp. softened butter

Directions:
Place skillet over high heat with the butter and oil. When the butter and oil are bubbling in the skillet, add the onions and saute over moderate heat for about 10 minutes, rolling the onions about so they will brown as evenly as possible. Be careful not to break their skins. You cannot expect to brown them uniformly. Meanwhile, wrap parsley, bay leaf, and thyme in cheesecloth. Pour liquid in pan and add herb bouquet. Cover and simmer slowly for 40 or so minutes or until the onions are perfectly tender but retain their shape, and the liquid has evaporated.

Mushrooms:
1/2 pound fresh mushrooms, washed, well dried, left whole if small,
sliced or quartered if large
2 tbsp. butter
1 tbsp. olive oil

Directions:
Place a skillet over high heat with the butter and oil. As soon as you see that the butter foam has begun to subside, indicating it is hot enough, add the mushrooms. Toss and shake the pan for 4 to 5 minutes. During their saute the mushrooms will at first absorb the fat. In 2 to 3 minutes the fat will reappear in thier surface, and the mushrooms will begin to brown. As soon as they have browned lightly, remove from heat.

**when salted, it is heavenly!

Le Tarte Des Demoiselles Tatin (upside-down apple tart)

Ingredients
Crust:
2/3 cup flour
1 tbsp. granulated sugar
1/8 tsp. salt
4 tbsp. butter, chilled and cut into bits
1 1/2 tbsp. shortening, cold
2 1/3- 3 tbsp. cold water
Filling:
4 lbs. firm cooking apples (Golden Delicious)
1/3 cup granulated sugar
Optional: 1tsp cinnamon
2 tbsp. softened butter
1/2 cup granulated sugar
6 tbsp. melted butter

Directions:
Place the flour, sugar, and alt in the food processor fitted with steel blade. Add butter and shortening. Pulse 4 or 5 times. With processor running, pour in water until dough forms a ball. If not, drizzle in a little more water. Scrape dough out onto a slightly floured surface. With the heel of one hand, rapidly press the pastry down on the board and away from you in a firm quick smear. Gather dough again into a mass and form a round ball. Sprinkle it lightly with flour. Wrap and refrigerate for 2 hours or until chilled.

Quarter, core, and peel the apples. Cut into half length-wise slices 1/8 inch thick. Toss in a bowl with the 1/3 cup of sugar and cinnamon. You should have about 10 cups of apples. Select a round baking dish that is 9- 10" in diameter and 2- 2 1/2" deep, and butter heavily, especially on the bottom. Sprinkle half of the remaining sugar on the bottom of the dish and arrange 1/3 of apples over it. Sprinkle with 1/3 of melted butter. Repeat with a layer of half the remaining apples and butter, then a final layer of apples and butter. Sprinkle the rest of the sugar over the apples.

Preheat oven to 375 degrees. Roll out your pie crust to a thickness of 1/8", and cut it the size of the top of the baking dish. Place it over the apples, allowing its edges to fall against the inside edge of the dish. Cut 4 or 5 holes about 1/8" long in the top of the pastry to allow cooking steam to escape.

Bake in the lower third of the preheated oven for 45 to 60 minutes. If the pastry begins to brown too much, cover it lightly with aluminum foil. Tart is done when you tilt the dish and see that a thick, brown syrup rather than a light liquid exudes from the apples between the crust and the edge of the dish.

Immediately unmold tart onto a serving dish. If the apples are not a light caramel brown, which is often the case, sprinkle rather heavily with powdered sugar and run under a moderately hot broiler for several minutes to caramelize the surface lightly. Keep warm until serving time, and accompany with a bowl of cream. May also be served cold.

Creme Anglaise

Ingredients:
1/2 cup granulated sugar
4 eggs yolks
2 tsp. corn starch
1 3/4 cup milk
1 large vanilla bean
1 tbsp. liquer (optional)

Directions:
Split vanilla bea in half and scrape insides into milk. Bring milk to a gentle boil. While waiting for milk to boil start to beat the sugar into the egg yolks and continue beating for 2 or 3 miuntes until the mixture is pale yellow and forms ribbons. Beat starch into mixture. Remove vanilla bean from milk.

While beating the yolk mixture, very slowly pour the boiling milk into the yolk mixture so that the yolks are slowly warmed. Do not add the milk too quickly or the yolks will curdle.

Transfer the mixture to a sauce pan and continuously stir with a wooden spoon over a medium flame until the sauce thickens. Do not let the custard come anywhere near a simmer. Maxium temperature is 165 degrees. Beat the sauce off heat for a minute or two to cool it. Strain through a fine seive. Add liquer to finished sauce.

**The apple tart with the creme anglaise was truly divine!!!!

Buttery Crescent Rolls

Friday, November 27, 2009
No more store bought rolls for this family. I decided to make them from scratch and with all that homemade lovin'. So after killing my yeast twice, 6 yeast packets later, and one emergency run to the store at 10 pm ... I finally got it right.

These need time to rise, but don't look risen until about ten minutes left. This made me really nervous at first but with patiencce, it works. The dough was extremely easy to work with. Cutting and shaping them was a breeze. I made these the night before and just placed them in an air tight box to reheat them for Thanksgiving dinner.

Crescent Rolls

2 1/4 tsp active dry yeast
1/4 cup water, warm (100-110F)
1/2 cup milk, warm (100-110F)
1 tbsp sugar
2 cups bread flour
1/2 tsp salt
4 tbsp butter, room temperature

In the bowl of a stand mixer fitted with a dough hook, or in a large bowl if you prefer to mix by hand, combine yeast, water, milk and sugar. Let stand for 5 minutes, until foamy. Add in bread flour and salt and mix well with a dough hook. Cut the softened butter into three or flour pieces and drop them into the dough, letting the mixer blend them in.

Knead (with a mixer or by hand) for about 2 minutes. Cover the bowl and let rise for 45 minutes in a warm place.
Preheat oven to 400F.

Turn risen dough out onto a lightly floured surface. Press it out into a circle with your hands, then use a rolling pin to roll it out into an even, 10-inch circle.

Use a pizza cutter or a sharp knife to divide the circle into 12 triangles (just like slicing a pizza).
Starting with the outside edge of one of the triangles, roll the edge towards the center of the “pizza.” Once rolled, curve the roll slightly into a crescent shape and place on a parchement-lined baking sheet. Repeat with all rolls. Cover rolls with a clean dish towel and let rise for 20 minutes.
Melt additional 1 tbsp butter in a small bowl. Brush tops of rolls with butter butter.


Bake for 14-18 minutes, until golden brown. Allow to cool on a wire rack for at least 10 minutes before serving.

Makes 12 rolls.

Thanksgiving Morning Cinnamon Rolls

Wednesday, November 25, 2009
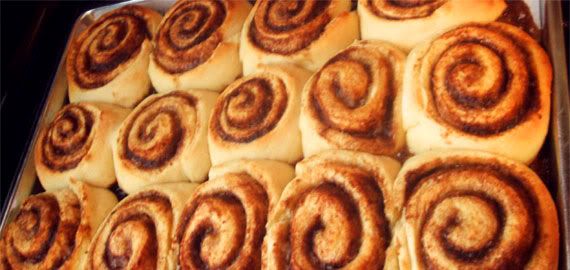
For Thanksgiving morning we wanted a tasty treat that would start our day off right. What else can do that but cinnamon rolls!! My last experience wasn't so great, but that's because I tried to make a different recipe and not my mom's traditional one. Big mistake/disappointment. This time around, I'm sticking to the old favorite.

These can not be compared to any other cinnamon roll. They are super soft and tender. The amount of sugar and cinnamon is in perfect ratio with everything else. The icing can be described as followings: It blows every other cream cheese or regular icing out of the water! The amount of cream cheese in it is minimal, but that's what's so great about it. You get the hint and flavor of cream cheese but it's not at all overwhelming. Also, there's a big secret ingredient that I love. Whipping cream. By adding this cream to it, you get a fluffy and silky creamy icing.

Making these is no harder than any other cinnamon roll. And honestly, not powerful mixer or anything other than your hands is 'kneaded'. Hahaha, get it? But seriously, these aren't hard at all and they produce the best cinnamon rolls I have ever tried in my life.

The recipe itself is from a book called Miserly Moms. It's a book focusing on how to save money on everyday things. There some other really great recipes I'll hopefully get to trying.

Cinnamon Rolls
Dough
1 tablespoon dry yeast
1 cup warm milk
1/3 white sugar
1/2 cup melted butter
1 teaspoon salt
2 eggs
4 cups of flour


Dissolve yeast in warm milk. Add the rest of the ingredints and mix well. Knead into a ball. Let rise until doubled in size. When ready, roll out to about 1/4 inch thick. Spread with filling.

Filling
1/4 cup butter, softened
1 cup brown sugar
3 tablespoons cinnamon

Spread butter evenly over dough. Sprinkle sugar and cinnamon over dough evenly as well. Roll dough up. Slice roll into 1 inch slices. Place in a parchment paper lined pan. Let rise again until doubled. Bake 10 minutes at 400 degrees.


Icing
1/2 cup butter, softened
1 1/2 cups powdered sugar
1 oz. cream cheese
2 tablespoons whipping cream
1 teaspoon vanilla extract
pinch of salt

Beat until fluffy. When rolls are hot, spread lots of icing on them.

Tip: To make these the night before,skip the final rising step. Let rise in the fridge overnight and bake them in the morning.

**We used parchment paper because they come out really cleanly, however, that isn't so "miserly" I guess. So the recipe just says to butter your pan.

Added: I shamelessly ate three of these deliciousnesses for breakfast=))

Thanksgiving Dinner Menu 2009

Sunday, November 22, 2009
This is kinda last minute but I just wanted to let you guys know...


The Menu:

Roast Turkey
Mashed Potatoes

Turkey Gravy

Grandma's Bread Stuffing

Cheesy Cauliflower

Corn

Cranberry Sauce

Butternut Squash Soup

Homemade Crescent Rolls

Browned Butter Pecan Pie

Chocolate Cream Pie
Sparkling White Grape Juice

Wine


Hopefully we're able to get the sparkling white grape juice for me, the under-age one. It's so tough to get and even though I warned my mom to shop for it early, still nothing. Also, we're hoping for cinnamon rolls in the morning. Using MY ALL TIME FAVORITE RECIPE! So much better than the Bread Baker's Apprentice one's I made. But, school work first. And trust me, a 10 page outline with 30 note cards and bib cards might be important to my grade. Okay, this was quick, but there you go!

Butternut Squash Lasagna

Saturday, November 21, 2009
Ugh! This dish was so frustrating! But I did it.

1) Removing the the skin and cubing? My hands were purple afterward. Over an hour at least.
2) Pureeing the butternut squash without a food processor? Impossible. I guess it's supposed to be creamy smooth. Chunky style is more like how I got it.
3) Thickening the white sauce? Burned the bottom. I guess it got thick...
4) Taste? Really good, but not worth the trouble.


Butternut Squash Lasagna Recipe
from Giada De Laurentiis

Ingredients

1 tablespoon olive oil
*****1 (1 1/2 to 2-pound) butternut squash, peeled, seeded, and cut into 1-inch cubes
Salt and freshly ground black pepper
1/2 cup water
3 amaretti cookies, crumbled
1/4 cup butter
1/4 cup all-purpose flour
3 1/2 cups whole milk
Pinch nutmeg
3/4 cup (lightly packed) fresh basil leaves
12 no-boil lasagna noodles
2 1/2 cups shredded whole-milk mozzarella cheese
1/3 cup grated Parmesan

Directions

Heat the oil in a heavy large skillet over medium-high heat. Add the squash and toss to coat. Sprinkle with salt and pepper. Pour the water into the skillet and then cover and simmer over medium heat until the squash is tender, stirring occasionally, about 20 minutes. Cool slightly and then transfer the squash to a food processor. Add the amaretti cookies and blend until smooth. Season the squash puree, to taste, with more salt and pepper.


Melt the butter in a heavy medium-size saucepan over medium heat. Add the flour and whisk for 1 minute. Gradually whisk in the milk. Bring to a boil over medium-high heat. Reduce the heat to medium and simmer until the sauce thickens slightly, whisking often, about 5 minutes. Whisk in the nutmeg. Cool slightly. Transfer half of the sauce to a blender*. Add the basil and blend until smooth. Return the basil sauce to the sauce in the pan and stir to blend. Season the sauce with salt and pepper, to taste.


Position the rack in the center of the oven and preheat to 375 degrees F.

Lightly butter a 13 by 9 by 2-inch glass baking dish. Spread 3/4 cup of the sauce over the prepared baking dish. Arrange 3 lasagna noodles on the bottom of the pan. Spread 1/3 of the squash puree over the noodles. Sprinkle with 1/2 cup of mozzarella cheese. Drizzle 1/2 cup of sauce over the noodles. Repeat layering 3 more times.


Tightly cover the baking dish with foil and bake the lasagna for 40 minutes. Sprinkle the remaining mozzarella and Parmesan cheeses over the lasagna. Continue baking uncovered until the sauce bubbles and the top is golden, 15 minutes longer. Let the lasagna stand for 15 minutes before serving.

*When blending hot liquids: Remove liquid from the heat and allow to cool for at least 5 minutes. Transfer liquid to a blender or food processor and fill it no more than halfway. If using a blender, release one corner of the lid. This prevents the vacuum effect that creates heat explosions. Place a towel over the top of the machine, pulse a few times then process on high speed until smooth.


***Okay, don't following Giada's method of cubing and junk for your squash. I think cutting it lengthwise in half and then roasting it will give you the smooth style I was hoping for. At least better than cubing and junk.

Gingerbread Squares

Friday, November 20, 2009

I'm a member of the National Honor Society (NHS) at my school. And our biggest fundraiser of the year is definitely the Turkey Bingo. It's a huge bingo where if you're the only one to win a bingo for that round and don't have to share your prize, you get a turkey. Otherwise you get money. This also means we haven't bought our turkey yet because my mom is hoping she'll win.

As a member of NHS you have to do a ton of stuff for this bingo; make a $50 dollar basket for the Chinese auction, buy a door prize, help set-up, work from 6-10, help clean-up, cut and staple bingo cards, sell tickets, and bring a baked goodie. All of which are pretty annoying, except for the last one. At one of our meetings they asked us right on the spot what we were going to bring. What? No googling? No looking at my favorite blogs for inspration? No checking our recipe bucket in the kitchen? Nope.

So I opted to sign up last in order give myself more time to think. Bad idea. I hadn't realized but only a certain number of people could sign up for each dessert category. When I got there here's what I saw. Brownines= full. Cakes= full. Pies= full. Cookies= full. Bread= still open! I wasn't super excited for bread, though. Pumpkin, banana, and lemon had all already been taken so there wasn't a ton of choices left. And then it came to me. Gingerbread! How appropriately seasonal, too.

I did, however, bend the rules. I made gingerbread, but I cut it into bars. Whatever, it's the same thing. It came together so fast! And it turned out so perfect! I used the recommended time and it cooked evenly.


from Pie Town
Gingerbread Squares:
- 1 cup brown sugar
- 1/2 cup molasses
- 1/4 cup melted butter
- 2 eggs
- 1 tsp vanilla
- 2 cups flour
- 1 tsp ground ginger
- 1/2 tsp baking soda
- 1/2 tsp cinnamon
- 1/4 tsp ground cloves
- generous 1/4 tsp salt

Preheat the oven to 350 degrees; line a 13 x 9 inch pan with parchment.
Whisk together dry ingredients in small bowl, minus the sugar. In larger bowl, whisk together butter, sugar, molasses, eggs, and vanilla. Add dry ingredients to wet, mix until combined, then pour into prepared pan. Bake until toothpick is clean, about 40 minutes.
Watch it before then, though. On another blog they said it was done a bit before then.
Cool in pan for 45 minutes, then spread on icing.


Icing:
4 cups powdered sugar
1/4 cup milk
1/4 cup softened butter
1 tsp orange peel ( I prefer it from the jar actually. It's better texture wise and tastewise.)

Combine all ingredients in a bowl. Spread over gingerbread when it's completely cool. Add festive sprinkles if you like.

Unfortunately, I couldn't try any=((. But, I'll probably end up buying it at the bingo just so I can tell you how it tastes! I'll post it soon.

Added later on...: I tried them at the bingo and they were absolutely perfect! They were exactly as I could have hoped or imagined. They were dense and chewy with a dominant flavor. The icing, though from a different recipe, is my dad's favorite and well worth it. That orange peel adds so much dimension to it. It's also fabulous because there's a wonderful 1/4 inch layer of frosting that pairs so beautifully with the gingerbread... ahh. Gingerbread at its perfection. Look no further for a better recipe!

MSC: Sweet Potato Cupcakes

Sunday, November 15, 2009

Sweet potatoes. In cupcakes. With marshmallows. And pecans. These were a huge surprise taste wise. I expected to eat and some what like them, but never to love them.

I don't know if they were supposed to, but my cupcakes fell considerably. I was not upset by this or anything, (in the past my cupcakes tend to be on the mile high side), but I just wasn't sure if that happened to anyone else. I didn't toast my marsh mallows, either. Instead, when I wanted to eat one, I would top it with marsh mallows and put it in the microwave for 20 seconds. Then, I would top that with toasted pecans, 'cause I wasn't up for candy-ing. My co-workers were very skeptical to try these. They aren't the most appealing to the masses type cupcake out there according to looks, which is unfortunate because they are very good. Oh, well. Hah, some people told me they liked my pumpkin cupcakes after they took a bite. Oh, silly King's employees.


I halved the "makes 24" recipe and still got 21 cupcakes out of it. I may not have filled them as much as needed but usually my cupcakes grow considerably. Could this be linked to the falling?

Whipping this together was fairly easy, except for getting my butter to cream with the dark brown sugar and regular sugar. But I got it eventually.

These cupcakes definitely have a different taste than that of the others I've made. In the past there have been spongy, but not at all dry cupcakes. Yet these, were extremely moist. Isn't it incorrect to say creamy? Probably. So maybe not creamy, but.. Oh! Like pecan pie but with sweet potatoes! So maybe sweet potato pie actually... That's what it's like. So not very cake-like but enough to give structure yet definitely soft.

And as I was filling the cups, and tasting the batter, I thought it didn't taste so good and it'd be okay if this one wasn't a favorite. But boy was I wrong. Martha just never fails to please me! I loved these sooo much. Trust me, your mouth/stomach will thank you.


The pecans and marshmallows made me really nervous. I do not at all like marshmallows what so ever. But I went for it. The pecans, too, are necessary. Because the cupcake is really moist and soft, you need some sort of crunch to balance it off, and what better pair is there than sweet potatoes and pecans? Together, the marshmallows and pecans unite to form a super team and take your cute little cuppy cakes to super stardom status. I may be exaggerating just a bit, but these are perfectly joyful bites of Fall for your mouth.


Thanks a ton to Karen for hosting this month's bake.

Baked Short Ribs and Cornbread

Friday, November 13, 2009

I'm back and better than ever! Preparing these home cooked meals for my family for dinner is so great to do again. They're happy, I'm happy, and so are our wallets.

And, it's a Friday night and what does a high school girl like myself have planned to do? Make dinner of course. On the menu: Baked short ribs in a red wine sauce and buttermilk cornbread with homemade creamed corn. As soon as I got home from school (3:04), I began dinner. I found a "quick" short ribs recipe and had that browning and in the oven in no time. Then I struggled with the side. Eventually a craving for cornbread overtook me, and I went for it. I started by making some creamed corn to put in it since we've had a bag of frozen peas in our freezer for almost a year now...

Making creamed corn is pretty easy and extremely tasty. My mom and I both hate most corn since we're usually given what's out of a can. But we both we drooling for this stuff! Think about making this sometime 'cause its worth it and much better than canned crap.

Well, I didn't actually have any cornmeal. So, when my mom got home she ran out and got some (thanks again, mom!). I whipped the ingredients together real fast in order to get it made in time to eat. Unfortunately, in my rushing I didn't notice you were supposed to keep the wet and dry ingredients separate until the end. Kind of obvious, I know. I just mixed as I went. 20 minutes later we were eating. The cornbread had such great flavor. It had exactly the taste I was looking for. Unfortunately, (and possibly due to the strange why I combined the ingredients), it was very dry. My family and I still devoured it down, with plenty of butter, though.

And of course the main attraction, the meat, was fantastic! I've never had that kind of cut before but it was cheap at the store ($4.75 for a pound, at least I think that's cheap). We use a ton of salt on our foods in my house, but none was needed for this meat.

These were all new dishes for my family tonight, and really out of the norm for us. I'm really glad I went outside of my comfort zone and tried the new and exciting recipes!


In the browning stage

Straight out the oven (Can you see that steam?!)

Baked Short Ribs

found here

Go and get it:
1 pound short ribs
1 tablespoon flour
¼ teaspoon paprika
½ teaspoon salt
1/8 teaspoon pepper
1 cup red wine
1 clove garlic

The how-to:
Preheat oven to 300° F.
Roll ribs in flour seasoned with paprika, salt and pepper. Brown in hot fat.
Place ribs in casserole, add wine and garlic. Cover and bake in a slow oven (300° F. ) for two and one-half hours or until tender.


Creamed Corn

from Simply Recipes

Go and get it:
1/2 large onion, finely chopped
2 Tbsp butter
1 1/2 cups frozen corn
1 teaspoon sugar
1/8 teaspoon nutmeg
1/2 cup heavy cream
Coarse salt and freshly ground pepper

The how-to:
In a large saucepan, melt 1 Tbsp of the butter on medium heat. Add the chopped onions and cook 2 to 3 minutes until translucent.

Add the corn to the onions and butter in the saucepan. Add 2/3 a cup of water and the remaining 1 Tbsp of butter. Bring to a simmer, reduce heat and cover. Cook for 10-15 minutes until the corn is tender.

Add the sugar, nutmeg, and cream to the corn. Cook, uncovered, for 5-6 minutes, stirring occasionally. Add salt and pepper to taste.


Buttermilk Corn Bread with Creamed Corn

from here

Go and get it:
2 cups yellow cornmeal
1 teaspoon salt
1 tablespoon sugar
2 teaspoons baking powder
1/2 teaspoon baking soda
1 cup buttermilk
2 eggs
1 cup creamed corn
2 tablespoons canola oil
optional bread crumb topping

The how-to:
Preheat oven to 425 degrees.

In a bowl, combine the cornmeal, salt, sugar, baking powder, and baking soda. Whisk together to combine well.

In a large bowl, combine the buttermilk, eggs, and creamed corn, whisking together to combine thoroughly. Add the dry ingredients to the buttermilk mixture and stir to combine. If the batter will not pour, add more buttermilk to the batter. Add bread crumb topping if interested.
Spread canola oil along your baking dish. Pour the batter into the dish. Bake until the cornbread is golden brown and springs back upon the touch, about 20 minutes.

Twice Baked Potatoes and Spicy Pork

Thursday, November 12, 2009

Before I get to the recipes, here's what's happening:

Our school's spring musical this year is Once on This Island. I'm very excited!! We had auditions already and I did really well. I was asked to sing 2 times and I got called back to read. All pretty good signs in my book. Also, I heard from one girl whose mom is the choreographer, that I got a call back!! So I'll keep you posted as I find more out.

I'm also in our school's Christmas play. It's written and directed by my history, so it's really amateur stuff. It's A Sponge Bob Story, based off A Christmas Story. I did it for fun with friends and we're like a small band in it. It's a singing role so I'm happy.

Okay, recipe time.
I love that I'm getting back to making nice homemade dinners again. Too often it's much easier to fall into a routine of eating out or having fish sticks (cough cough mom..) or another frozen dinner. So this meal made me extremely happy. My mom begin the potato cooking process for the first bake while I did the rest. I also left the meat to her, since she always does a great job.

I loved loved loved the potatoes. Cheesy, creamy, mashy goodness. It was a big hit! The meat was fabulous as well. The rub is quite spicy but super great. My dad of course suggested less spice next time, but I'm always an extremist when it comes to starring ingredients. The meat was also very juicy and not dry like I was afraid it would be, because I'm always afraid pork is dry. Fact: I'm not a fan of pork. My mom surprises me though and at times I forget=).


Twice Baked Potatoes
from Betty Crocker's Cooking Basics

Cook time: 1 hour 15 minutes for first baking plus 20 minutes for second baking

Go and get it:
2 large baking potatoes (russet or Idaho), 8 to 10 ounces each
2 tablespoons margarine or butter
2 to 4 tablespoons milk
1/8 teaspoon salt
dash of pepper
1/2 cup shredded cheddar cheese
2 teaspoons chopped chives

What to do:
1. Heat the oven to 375. Scrub the potatoes thoroughly with a vegetable brush, but do not peel. Pierce the potatoes on all sides with a fork to allow steam to escape while the potatoes bake. Place potatoes directly on the oven rack.

2. Bake potatoes 1 hour to 1 hour and 15 minutes or until potatoes feel tender when squeezed gently. Be sure to use a pot holder because potatoes will be very hot to the touch.

3. Increase the oven temperature to 400.

4. When potatoes are cool enough to handle, cut them lengthwise in half. Scoop out the insides into a medium bowl, leaving about 1/4 inch shell in the potato skin.

5. Mash the potatoes with a potato masher, in an electric mixer, or by hand until no lumps remain. Add the milk in small amounts, beating after each addition. The amount of milk varies between the types of potatoes used.

6. Add butter, salt and pepper. Beat vigorously until potatoes are light and fluffy. Stir in the cheese and chives. Fill the potato shells with the mashed potato mixture. Place on an ungreased cookie sheet. Bake potatoes uncovered about 20 minutes or until hot.

Makes 4 servings.


Dry Rub Pork Chops
adapted from Simply Recipes Mom's Perfect Pork Chops

Go and get it:
Dry Rub:
1/4 cup salt
1/8 cup pepper
1/2 tablespoon garlic
1/2 tablespoon oregano
1/2 tablespoon celery seed
1/2 tablespoon paprika
1/2 tablespoon chile powder

Pork Chops:

1. Heat a large cast iron frying pan to medium high or high heat (hot enough to sear the meat). While the pan is heating, sprinkle dry rub spices on each of the pork chops. Using your fingers, rub the spices into the meat. Turn the chops over and repeat on the other side.

2. Once the pan is hot, add a teaspoon of oil to the pan and coat the bottom of the pan. Right before you put the chops into the pan sprinkle each side with a little salt, or you can salt the chops in the pan. Put the chops in the pan. Make sure they are not crowding each other too much. There should be space between the chops in the pan or the meat will steam and not sear properly.

3 Sear the chops, about 2 minutes on each side. Watch carefully, as soon as the chops are browned, flip them.

If you have chops that are a lot thicker than 3/4" (many are sold that are 1 1/2"-thick), you can put a cover on the pan and let the chops finish cook for 5 minutes or so.

Sweet Sausage in a Creamy Red Sauce

Monday, November 9, 2009
This is a lame recipe but I decided to share it anyway. Nothing special here. But its a nice sausage meal with a cream sauce that's also a red sauce. A perfect combination I think. And who doesn't love caramelized onions?


Go and get it:
olive oil
butter
5 links sweet sausage, cut into coins
1 large green pepper
3 medium onions

To begin:
Heat 1 tablespoon olive oil and 2 tablespoons of butter until nice and hot. Add sausage. allow them to not quite brown on both sides. Then add onions, cut into rings. Add pepper, cut into long slices. Cook as long as sausage is cooked but not burnt. I cooked it for quite awhile because I like really soft veggies.


Creamy Red Sauce

1 1/2- 2 cups of your favorite red sauce (we had a ton of marinara on hand and it worked lovely)
1 1/2 dollops of sour cream

Heat the red sauce and then add sour cream. Alter to taste.


Okay, so as a side note: I love Taylor Swift and of course I watched her on SNL this weekend. So here's a clip of her giving her opening monologue (song). Enjoy!